You must correctly configure the Operations Sentinel Trap Service on each node managed by Operations Sentinel through its trap service, so that SNMP traps from that node are forwarded to the Operations Sentinel server. Specify the following two items on each managed node:
Community name for the SNMP environment.
Trap destination IP addresses of the Windows systems that are running the Operations Sentinel Trap Service.
After you define these settings, stop and start the SNMP service on each managed node for the changes to take effect.
[Windows]
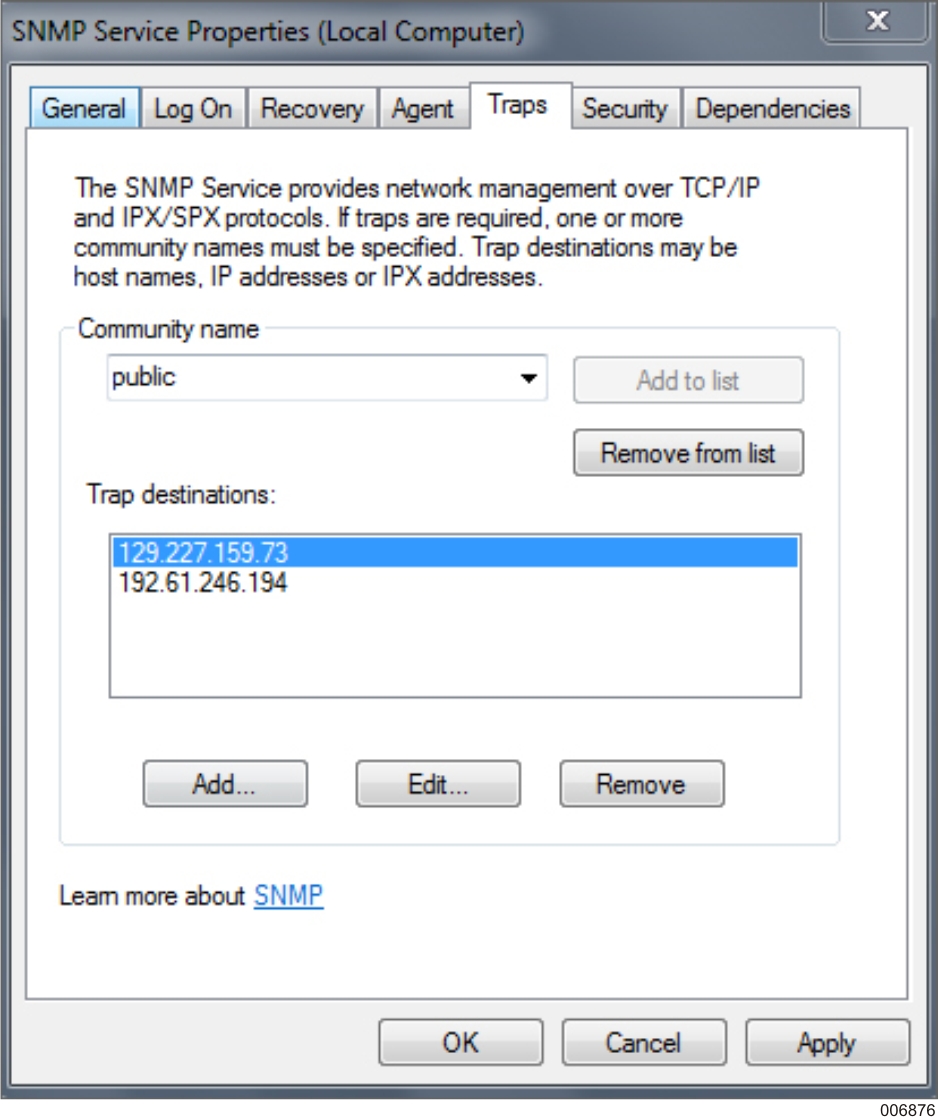
See Figure 16–16. In this example, the Trap destinations (Traps tab in the SNMP Service Properties window) on the monitored Windows system includes the IP address of the Windows system running the Operations Sentinel Trap Service and its Community name is set to “public.”
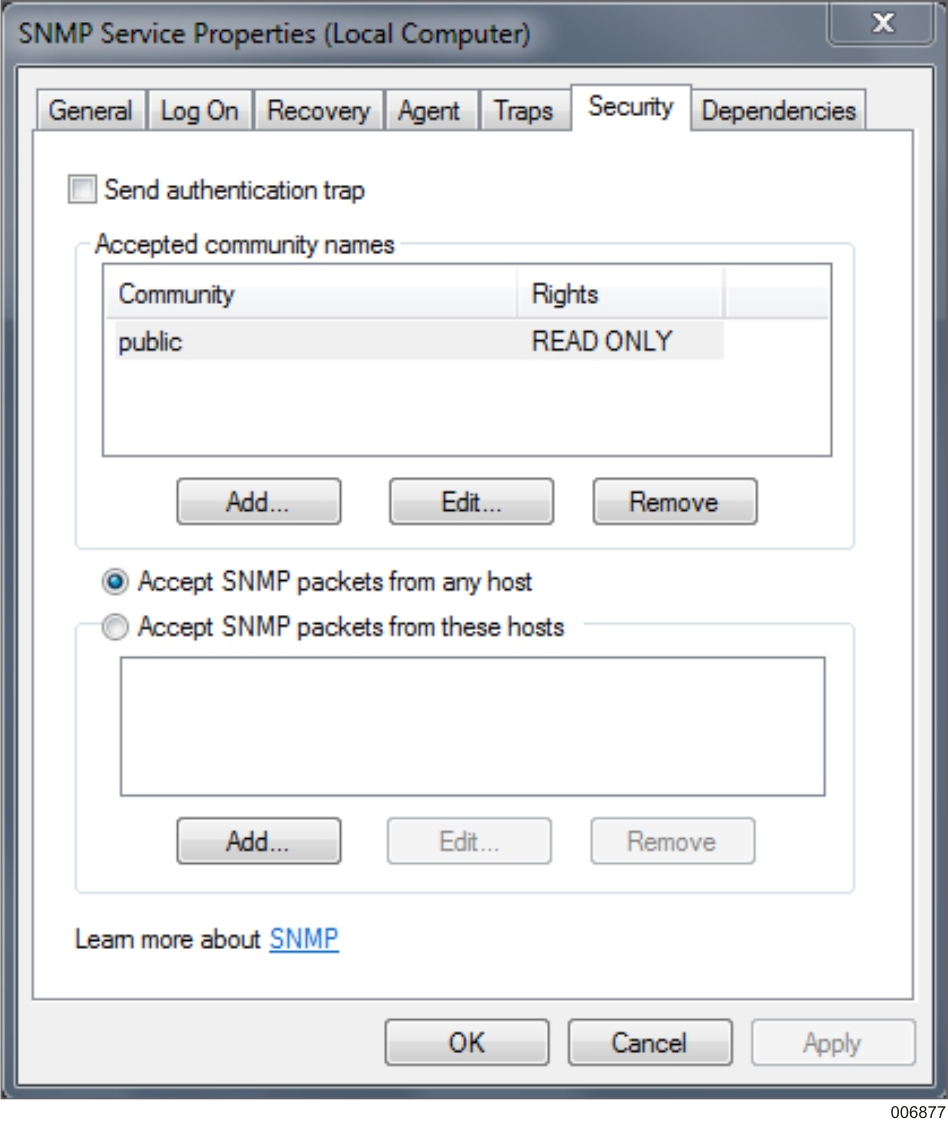
See 16–17. In the Security tab you can specify the accepted community strings with the associated permissions. You can also specify acceptance of packets from certain hosts or all hosts.
[UNIX/Linux]
To configure the trap destinations on a UNIX/Linux node, perform the following steps:
Verify if the SNMP package is installed. If not, install the SNMP package depending on the version and flavor of the UNIX/Linux machine.
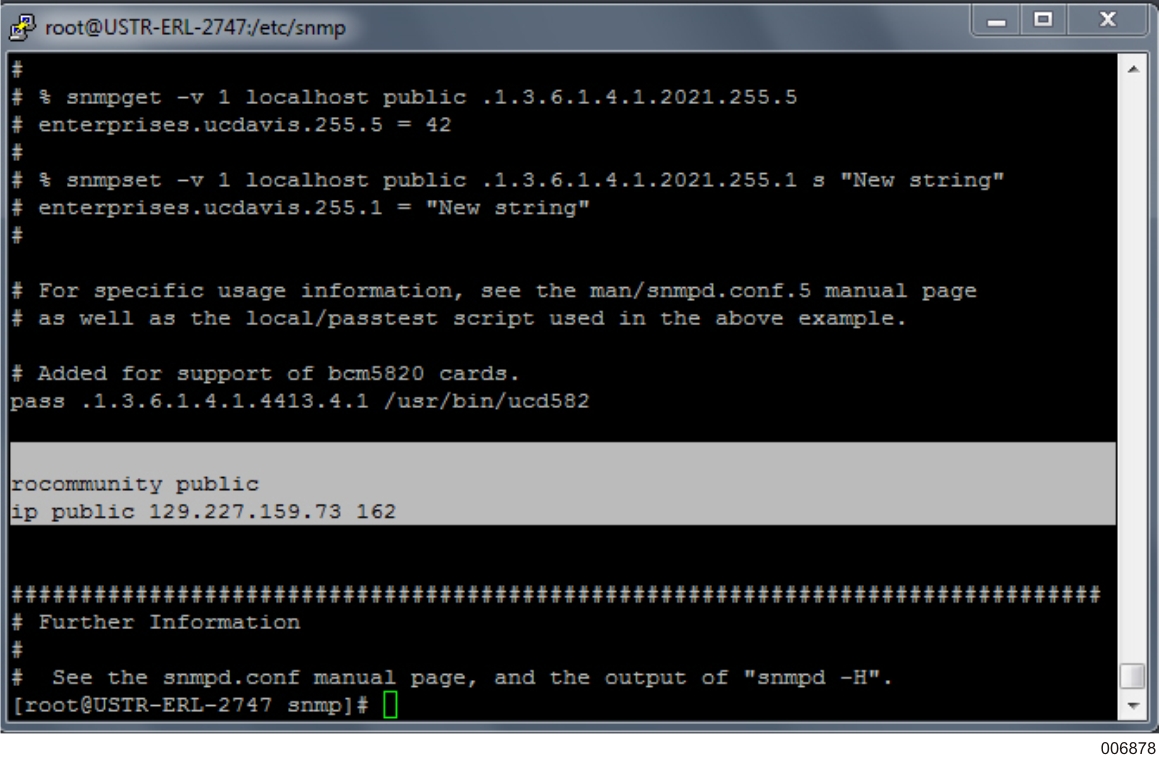
Navigate to /etc/snmp/snmpd.conf, and add trap destination IP address, community name, and standard SNMP port number.
Add domain name along with the IP address of the UNIX/Linux machine in /etc/hosts.
Point the ULRM agent to the trap destination IP address.
Add the IP address and domain name of the UNIX/Linux machine in the Windows hosts file located at C:\Windows\System32\drivers\etc (where the Operations Sentinel server resides).
You must stop and start the UNIX/Linux SNMP daemon for these changes to take effect.
For any other UNIX/Linux operating systems (Solaris, HP-UX, and so on), consult the appropriate Systems Administration documentation to correctly configure SNMP.